Introduction
How to make polymer clay bead – Making polymer clay beads is a fun, creative, and rewarding craft that allows you to customize jewelry, accessories, or even home decor items with unique, handmade touches. Whether you’re a beginner or an experienced crafter, the process of creating polymer clay beads offers endless possibilities for self-expression through color, shape, texture, and design. Here’s a step-by-step guide on how to make polymer clay beads, along with tips and ideas for taking your creations to the next level.

Materials You’ll Need
- Polymer Clay: Start with a block or several blocks of polymer clay in your desired colors. Popular brands include Sculpey III, Fimo Soft, and Premo. Each brand has its own characteristics, so experiment to find your favorite.
- Clay Conditioning Machine or Roller: A pasta machine (designated for clay use only) is ideal for conditioning clay and achieving uniform thickness. Alternatively, you can use a clay roller.
- Beading Needle or Toothpick: For making holes in the beads.
- Baking Tray and Parchment Paper: To bake your beads without sticking.
- Sandpaper or Nail File: For smoothing edges and surfaces after baking.
- Oven: Follow the baking instructions specific to the brand of clay you’re using.
- Design Tools: Optional but useful for adding texture or patterns. These can be simple household items like toothbrushes, stamps, or textured fabrics.
- Glaze or Varnish: Optional, for a shiny finish or added protection.
Step-by-Step Guide
1. Condition the Clay
- Begin by kneading a small amount of clay in your hands to warm it up and make it more pliable. For larger amounts, use a clay conditioning machine on the widest setting, passing the clay through several times until it’s soft and smooth.
2. Choose Your Bead Shape and Size
- Roll the conditioned clay into a snake or log shape for round beads. Vary the thickness for different sizes.
- For more intricate shapes, use cookie cutters, molds, or freeform shaping techniques. Experiment with squares, triangles, hearts, or any form that inspires you.
3. Create Texture and Patterns
- Before shaping the beads, you can add textures or patterns using various tools. Press stamps, lace, or textured sheets onto the clay to create interesting designs.
4. Make Holes
- Use a beading needle or toothpick to pierce a hole through the center of each bead, ensuring the hole is large enough for your intended stringing material. Pierce from both sides to meet in the middle to keep the hole straight.
5. Bake the Beads
- Preheat your oven according to the clay manufacturer’s instructions. Place the beads on a parchment-lined baking tray and bake for the recommended time, usually around 15-30 minutes per 1/4 inch thickness. Do not exceed the temperature specified for your clay type.
6. Finishing Touches
- After baking and cooling, gently sand any rough edges or surfaces with fine-grit sandpaper or a nail file for a smooth finish.
- If desired, apply a glaze or varnish following the product instructions for a glossy look and added durability.
Advanced Techniques and Ideas
- Mica Shift: A technique where you manipulate layers of clay to create a shimmering, almost holographic effect. This works well with metallic or pearlescent clays.
- Caning: A complex method of creating intricate, repeating patterns within a cane that can then be sliced to reveal beautiful designs on each bead.
- Mixing Colors: Experiment with blending different clay colors to achieve custom hues.
- ** Embedding Objects**: Try embedding small beads, glitter, or even dried flowers into your clay for added visual interest.
- Surface Treatments: Explore techniques like mica powder application, acrylic paint washes, or using alcohol inks for unique finishes.
Remember, the beauty of polymer clay lies in its versatility. Don’t be afraid to experiment and let your creativity guide you. As you gain experience, you’ll discover new techniques and ways to refine your craft, resulting in a collection of truly unique and personalized polymer clay beads.

Materials Needed:
- Polymer Clay: Choose high-quality polymer clay in various colors. Brands like Fimo, Sculpey, and Premo are popular choices.
- Work Surface: Use a smooth, clean surface like a ceramic tile, glass cutting board, or acrylic sheet.
- Clay Tools: Essential tools include a clay roller or pasta machine, cutting blade, needle tool, and shaping tools.
- Baking Tray: A metal or glass tray dedicated to baking polymer clay.
- Oven: A household oven for baking clay (do not use for food afterward).
- Sandpaper or Emery Board: For sanding and finishing beads.
- Varnish or Sealer: Optional for adding a glossy or matte finish.
Step-by-Step Guide:
1. Preparation:
- Condition the Clay: Knead the polymer clay until it’s soft, smooth, and pliable. Conditioning improves workability and removes air bubbles.
- Choose Colors: Select the colors you want to use and create color blends if desired. Always clean hands and tools between colors to prevent contamination.
2. Shaping Beads:
- Basic Shapes: Start with simple shapes like spheres, cylinders, or discs. Roll clay into balls between palms for round beads.
- Textures and Patterns: Add texture using tools like stamps, texture sheets, or create patterns with small tools.
- Holes: Use a needle tool or toothpick to create a hole through the center of each bead. Ensure it’s large enough for your threading material (e.g., wire, string, or cord).
3. Design and Detailing:
- Layering and Blending: Layer different colors or types of clay to create marbled effects or intricate patterns.
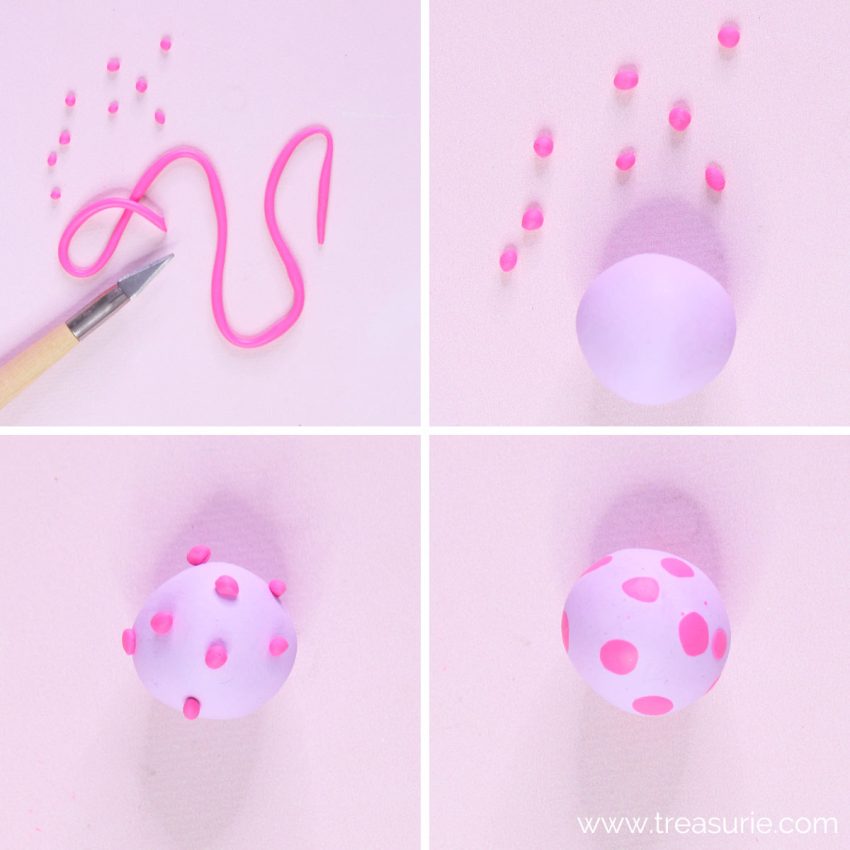
- Inlays and Embedding: Embed small objects like beads, crystals, or metal findings into the clay for added interest.
- Surface Decoration: Use techniques like cane slicing, mica powder application, or painting with acrylic paints for detailed designs.
4. Baking:
- Preheat the Oven: Follow the manufacturer’s instructions for baking temperature (usually around 275°F or 130°C).
- Baking Time: Place beads on a baking tray lined with parchment paper and bake according to thickness (typically 15-30 minutes per 1/4 inch or 6mm of thickness).
- Cooling: Allow beads to cool completely before handling or sanding.
5. Finishing:
- Sanding: After beads are cooled, sand any rough edges or imperfections with fine-grit sandpaper or an emery board.
- Polishing: Optionally, buff beads with a soft cloth or use a rotary tool with polishing attachments for a glossy finish.
- Sealing: Apply a thin layer of varnish or sealer to protect and enhance the beads. Allow to dry completely before using.
Tips for Success:
- Experiment: Explore different techniques such as caning, sculpting, or mixed-media effects.
- Clean Work Area: Keep surfaces and tools clean to prevent dust or debris from marring your creations.
- Storage: Store unused clay in airtight containers to prevent drying out.
- Safety: Polymer clay should only be baked in a well-ventilated area due to fumes emitted during baking.

Troubleshooting Tips:
- Avoiding Fingerprints: Smooth clay surfaces with your fingers or a soft brush dipped in rubbing alcohol before baking to minimize fingerprints.
- Preventing Bubbles: Knead clay thoroughly to remove air bubbles and use a piercing tool to release trapped air while shaping beads.
- Baking Issues: Ensure beads are evenly spaced on the baking tray and not touching each other or the sides of the oven to prevent distortion.
Inspiration and Resources:
- Online Tutorials: Websites like YouTube and crafting blogs offer tutorials on various polymer clay techniques and projects.
- Books: Look for books specifically dedicated to polymer clay bead making for in-depth guidance and inspiration.
- Community: Join online forums or local crafting groups to share ideas, ask questions, and gain feedback on your creations.
Final Thoughts:
Making polymer clay beads is a versatile craft that allows for endless creativity. Whether you’re a beginner or an experienced crafter, experimenting with colors, textures, and techniques can lead to stunning and personalized bead designs. Enjoy the process of crafting handmade beads that can be used in jewelry, home decor, or gifted to others, adding a personal touch to any project.
