Introduction to Pony Bead Crafts
Pony bead crafts are a vibrant and creative way to make jewelry, decorations, and more. These colorful, small plastic beads have a larger hole size which makes them perfect for threading. They’re ideal for both beginners and experienced crafters. People of all ages enjoy working with pony beads due to their versatility and the broad array of colors and finishes they come in.
Starting with pony bead crafts can be as simple as mastering a few basic techniques. Once you learn to create simple patterns and string beads, the possibilities expand. You can make everything from bracelets and necklaces to key chains and decorative items. One of the joys of working with pony beads is that you can mix and match them to suit any theme or occasion.
Not only are these crafts fun to make, but they also serve as excellent gift ideas. Whether for birthdays, holidays, or party favors, pony bead crafts can be personalized to create something unique. Moreover, it’s a cost-effective hobby that encourages creativity and can be a soothing way to spend time.
Throughout this blog, we will delve into various pony bead projects. We’ll cover the essential supplies you’ll need, provide a step-by-step guide to making pony bead bracelets, and even show you how to craft a detailed pony bead frog. If you’re planning an event, we have fun ideas for incorporating pony beads into your party activities. Lastly, we will tackle how to create DIY mini gift boxes with pony bead handles.
If you’re ready to dive into the world of pony beads, grab your supplies and let’s get started. The art of pony bead crafting awaits to unleash your creativity and bring splashes of color to your craft table!
Essential Supplies for Pony Bead Crafting
Before you start your next pony bead project, make sure you have the right supplies on hand. Having the essential materials will make your crafting experience smoother and more enjoyable. Here’s a list of the supplies you’ll need for most pony bead crafts:
- Pony Beads: These are the foundation of your project. Pony beads come in a multitude of colors and finishes. Choose a variety that suits your design vision.
- Elastic Cord or Fishing Line: Sturdy stringing materials, such as elastic cord for bracelets or fishing line for more structured projects, are crucial.
- Scissors: A good pair of scissors is necessary to cut your stringing material to the desired length.
- Key Rings or Lanyard Hooks: If you’re making key chains or lanyards, have these on hand to finish off your item.
- Pattern Guides or Templates: For complex designs, pattern guides can help you place your beads in the correct order.
- Clear Glue or Nail Polish: Sometimes, you might need a bit of glue or clear nail polish to secure the ends of your project after knotting.
- Measuring Tape or Ruler: Precision is key in crafting. Use a measuring tape or ruler to ensure your pieces are the correct length.
With these supplies ready, you’re all set to begin crafting with pony beads. Whether you’re a beginner or a seasoned crafter, having the essential supplies will make the process of creating your pony bead crafts a breeze. Remember to lay out your materials and plan your design before diving in. Let’s get those creative juices flowing and start crafting some colorful masterpieces!
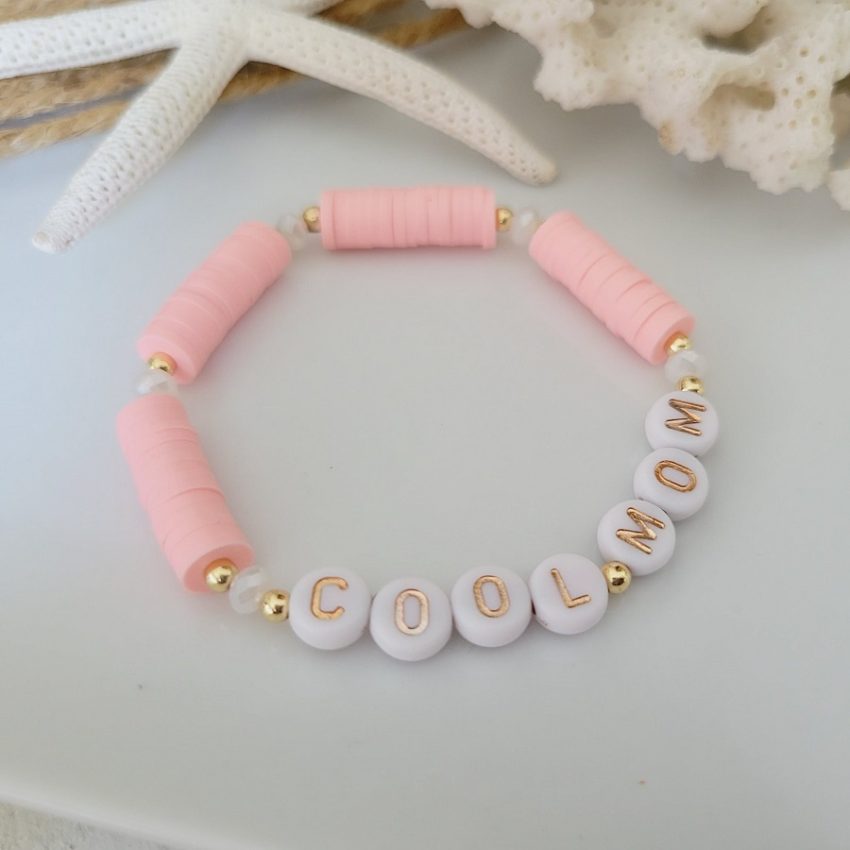
Step-by-Step Guide to Making Pony Bead Bracelets
Creating a pony bead bracelet is a fun and simple project that’s great for all skill levels. This step-by-step guide will take you through the process, ensuring that you end up with a beautiful piece of handmade jewelry. Let’s start crafting!
Materials Needed
To begin, gather your materials. You will need pony beads, elastic cord, scissors, and a ruler or tape measure.
Step 1: Measuring Your Wrist
First, use the measuring tape to determine the length of your wrist. Add an extra inch to ensure a comfortable fit.
Step 2: Cutting the Elastic Cord
Cut a piece of elastic cord based on the measurement. Remember to leave extra cord for tying off the bracelet.
Step 3: Threading the Beads
Start threading the pony beads onto the elastic cord. You can create a pattern or choose colors randomly.
Step 4: Checking the Fit
Periodically, check the bracelet fit by wrapping it around your wrist.
Step 5: Finishing the Bracelet
Once satisfied with the length, tie the ends of the cord in a secure knot.
Step 6: Securing the Knot
Apply a small dab of clear glue or clear nail polish to the knot to secure it.
Step 7: Trimming Excess Cord
After the glue dries, trim any excess cord close to the knot.
Your pony bead bracelet is now complete! Wear it proudly or give it as a personalized gift to a friend or family member. With pony bead crafts, you can express your creativity and make something special with just a few simple steps.
Creating Key Chains and Lanyards with Pony Beads
Key chains and lanyards are not just practical; they’re also fun to craft and can personalize your keys or ID badges. Making your own with pony beads is easy and rewarding. Here’s how you can craft your own key chains and lanyards with a touch of creativity.
Choose Your Beads and Materials
Before starting, select your pony beads and other materials. Key rings and lanyard hooks are a must-have. Pick colors that match your style or the theme you’re aiming for.
Plan Your Design
Think about the pattern or design for your key chain or lanyard. Plan the bead order if you’re following a specific design.
Cut the Cord to Length
Measure and cut your cord. Make it a bit longer than the finished product to allow for tying off.
Begin Threading Beads
Start adding beads onto the cord. Keep your pattern or design in mind as you thread each bead.
Attach the Key Ring or Lanyard Hook
Once the beading is done, attach the key ring or lanyard hook. Secure it to ensure it holds well.
Tie Off and Secure the End
Tie a knot at the end of your cord. Add glue for extra hold if needed.
Your Creation is Ready!
Now, you have a custom key chain or lanyard. It can be a great personal accessory or a thoughtful gift for someone special.
With pony bead crafts, you can easily turn a handful of beads into a unique and colorful creation. Experiment with different designs and colors to make each craft truly your own. Get creative and enjoy the fun of making key chains and lanyards with pony beads!
How to Make a Pony Bead Frog: A Detailed Tutorial
Are you ready to hop into a new pony bead craft? Making a pony bead frog is a detailed but enjoyable project. It’s perfect for adding a playful touch to your collection of handmade items. Follow this tutorial to create your own adorable amphibian friend out of pony beads.
Gather Your Materials
Before starting, collect all the necessary supplies. You will need green and black pony beads for the body and eyes, as well as yellow beads for added detail. Elastic cord, scissors, and a ruler are also essential.
Begin the Base
Cut a piece of elastic cord about 24 inches long. Thread a single green bead to the center and secure it as the starting point.
Form the Eyes
For the frog’s eyes, add one black bead to each side of the starting green bead. Thread two more green beads on each side and add another black bead to complete the eyes.
Create the Body
Continue by threading green beads to form the frog’s body. Follow the pattern of increasing and decreasing the number of beads per row to shape the body.
Attach the Limbs
Make the frog’s legs by threading green and yellow beads in the shape of limbs. Secure them by threading the cord back through the beads.
Finish Off Your Frog
Once the frog’s body is complete, tie off the cord tightly. Apply a dab of glue to the knot for extra security. Trim any excess cord after the glue dries.
Your pony bead frog is now complete! This eye-catching little critter can be used as a key chain, ornament, or given as a creative gift. With practice, you can make frogs in various colors or even design your own beaded animals. Enjoy the process and show off your new crafting skills!
 Fun Pony Bead Projects for Parties and Events
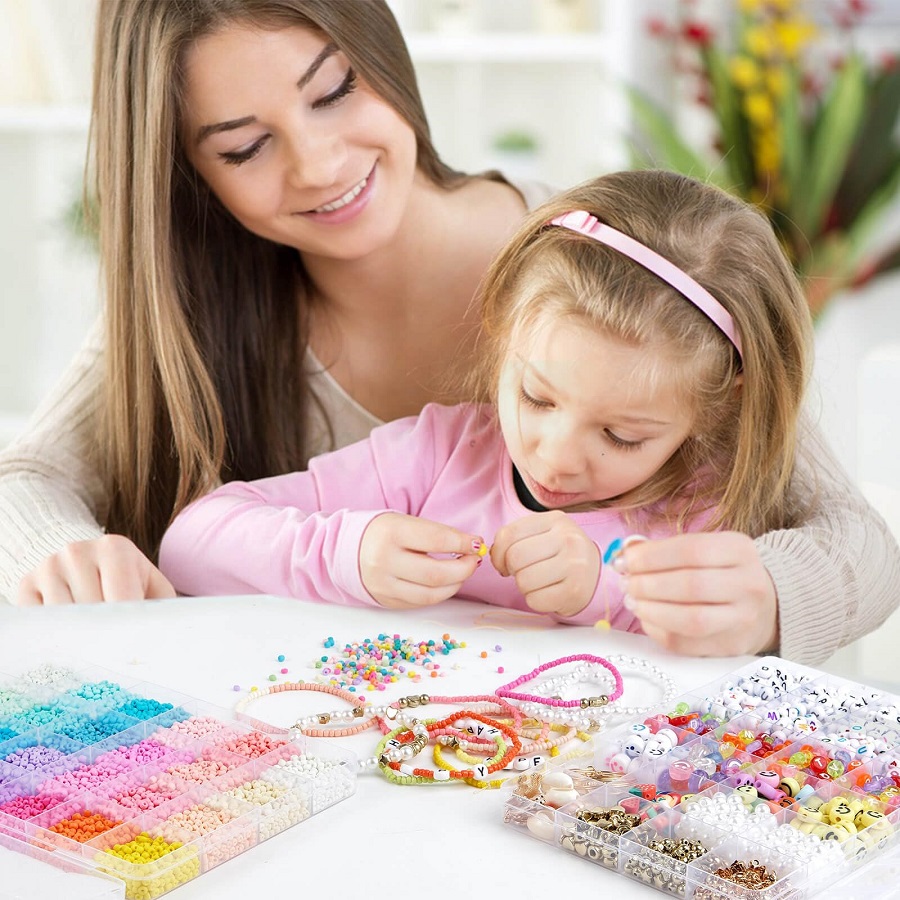
Pony bead crafts are perfect for parties and events because they offer guests engaging, hands-on activities. Both children and adults can enjoy making personalized items they can take home. In this section, we’ll explore some creative ideas that are sure to be a hit at your next gathering.
Bracelet and Necklace Making Station
Set up a table with various colors of pony beads and elastic cords. Guests can create their own bracelets and necklaces. Provide pattern guides for those who want to follow a design.
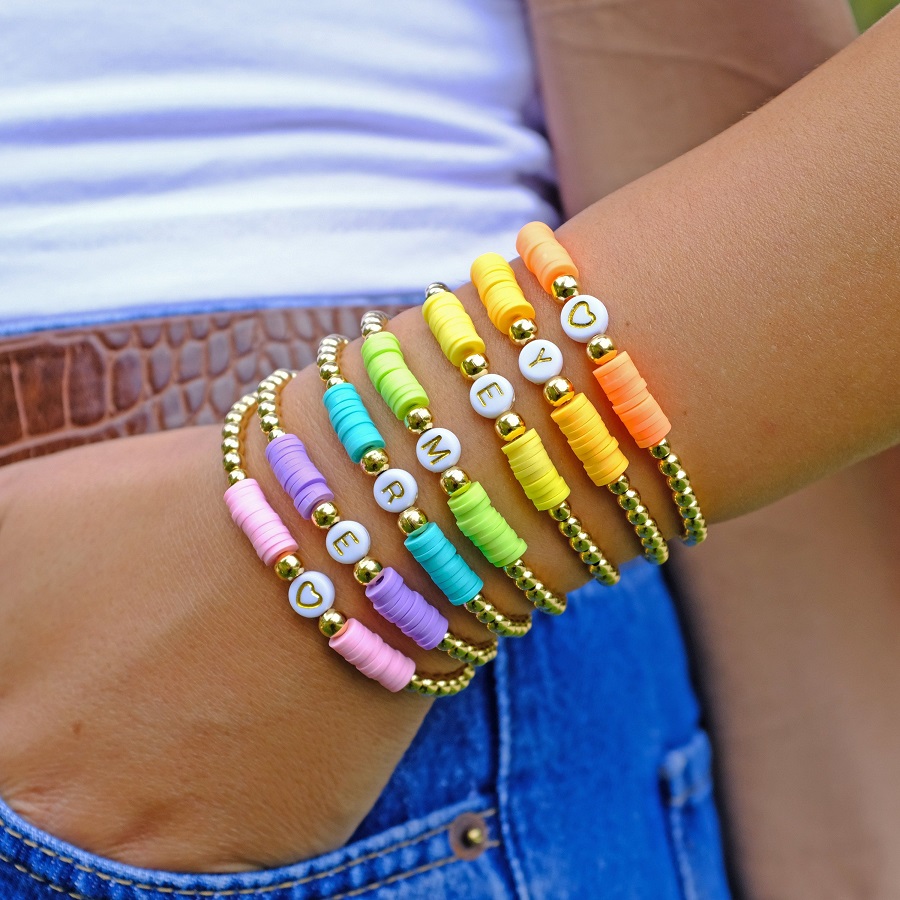
Pony Bead Keychains
Keychains make fantastic party favors. Supply guests with pony beads, key rings, and instructions. Encourage them to spell out names or make fun shapes.
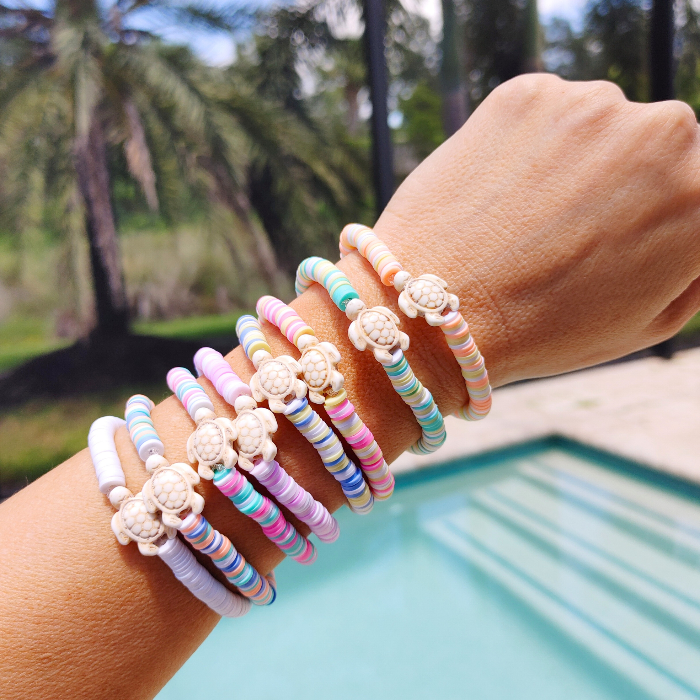
Pony Bead Animal Creations
Challenge partygoers to craft animals out of pony beads. Display examples like the pony bead frog. Offer guidance on how to thread beads for limbs and bodies.
Beaded Lanyards for Events
For a more practical craft, have attendees make beaded lanyards. These are great for holding IDs or keys, especially for events like conferences or workshops.
Custom Bead Coasters
Guests can design their own beaded coasters. These practical crafts make great souvenirs. They can choose a color scheme that matches their home decor.
With these fun pony bead crafts, your party or event will be memorable. Guests will enjoy the creativity and leave with a handmade treasure. Remember, provide clear instructions and plenty of supplies to keep everyone happily crafting!
DIY Mini Gift Boxes with Pony Bead Handles
Creating DIY mini gift boxes with pony bead handles is a novel way to add a personal touch to your gift presentation. Not only do they look adorable, but they also show the extra effort and creativity you invested into making the gift special. Let’s dive into how you can create these tiny treasures.
Gather Your Supplies
You will need cardstock or sturdy paper for the box, pony beads for the handles, an elastic cord or string, scissors, and a hole punch.
Download or Create a Box Template
Start by downloading a free box template or drawing one yourself. Cut out the template using scissors.
Assemble the Box
Fold the cutout along the lines to form the box shape. Secure the edges with clear glue or tape.
Punch Holes for Handles
Use a hole punch to make two holes on opposite sides of the box top.
String Pony Beads onto the Elastic Cord
Choose pony beads that match the box or the occasion. String them onto the elastic cord.
Attach the Handles
Thread the ends of the beaded cord through the holes on the box. Tie knots inside the box to keep the handles in place.
Fill with Gifts and Enjoy!
Your DIY gift box is ready! Fill it with small trinkets or sweets. The pony bead handles make it easy to carry and add a charming touch.
These mini boxes are excellent for birthday parties, weddings, or any occasion where a little gifting is involved. The pony bead handles not only make them easier to handle but also add a splash of color and personality to your gifts. Enjoy making and giving these unique gift boxes with pony bead handles.
 Tips for Hosting a Successful Bead & Bracelet Making Party
Hosting a bead and bracelet making party can be a blast with the right preparation. Here are some tips for ensuring your gathering is a hit:
Select a Range of Beads
Include a variety of pony beads in different colors and finishes. This lets guests choose their favorites and get creative.
Prepare the Essentials
Make sure you have ample supplies. Elastic cord, scissors, and clear glue are must-haves. Have backups just in case.
Set Up Crafting Stations
Arrange tables for different crafts. For example, one for bracelets, another for key chains. It keeps things organized.
Offer Simple Patterns
Provide guests with easy-to-follow patterns. It helps those new to pony bead crafts get started without stress.
Encourage Creativity
Let your guests know it’s okay to experiment. They can mix colors or create their own designs.
Keep Instructions Clear
Use clear, simple steps for each craft. This ensures everyone can follow along, regardless of their experience.
Have Snacks Handy
Crafting can build up an appetite. Offer snacks and drinks to keep everyone fueled and happy.
Plan for All Ages
If kids and adults will be attending, plan accordingly. Different crafts may suit different age groups.
Make Cleanup Easy
Set up trash bins and recycling around the room. This helps with quick cleanups and keeps your space tidy.
By following these tips, your bead and bracelet making party will be an event to remember. Guests will enjoy crafting and leave with their own handmade keepsakes!