Introduction
Halloween clay bead bracelet ideas – As the air turns crisp and leaves crinkle underfoot, Halloween approaches, bringing with it a sense of magic and mystery. What better way to celebrate this enchanting season than with a delightful DIY project? Crafting Halloween-themed clay bead bracelets allows not only for individual expression but also fills your space with the spirit of the holiday. Let’s dive into the world of spooktacular clay bead bracelets and discover how to create your own stunning accessories perfect for this time of year.

Why Clay Beads?
Clay beads offer several advantages: they are easy to mold, lightweight, and can be painted or glazed in various colors and finishes. This versatility makes them an ideal medium for representing Halloween symbols such as pumpkins, ghosts, bats, and witches. Plus, the tactile experience of working with clay can be incredibly therapeutic—a perfect way to unwind as Halloween festivities draw near.
Materials You’ll Need
Before diving into the crafting, here’s a list of materials you will require:
For the Beads:
- Air-dry clay or polymer clay: Choose in a range of colors like black, orange, purple, and white.
- A rolling pin: To flatten your clay.
- Cutters or cookie cutters: Various shapes related to Halloween.
- A toothpick or thin tool: For engraving or making holes.
- Paint or glaze (optional): Use for adding additional details or finishes.
- Sealer (optional): A clear acrylic sealer helps protect painted designs.
For Assembling the Bracelet:
- Elastic cord or beading wire: This will hold all of your beads together.
- Beading needle (if using wire): To help thread the beads.
- Scissors: To cut the cord or wire.
- Clasps (if using wire): To secure the ends of your bracelet.
Step-by-Step Instructions – Halloween clay bead bracelet ideas
Making the Clay Beads
Prepare Your Workspace:
Set up a clean, flat workspace. Lay down parchment paper to prevent the clay from sticking to your surface.
Shape Your Beads:
- Pumpkin Beads: Roll orange clay into small balls and use your fingers to shape them into a pumpkin form. Add a green stem by pinching a small piece of green clay at the top.
- Ghost Beads: Shape white clay into a tear-drop or oval shape, then use the toothpick to carve eyes and a mouth.
- Bat Beads: Flatten a small piece of black clay and cut out bat shapes using a cutter. Make sure to poke a hole at the top for stringing.
- Other Designs: Feel free to get creative! Think of candy corn, witch hats, or spooky spiders.
Dry the Beads:
If using air-dry clay, leave the beads out to dry for at least 24 hours. If using polymer clay, follow the manufacturer’s instructions for baking.
Painting and Finishing Touches
Once your beads are dry (or baked), it’s time to add some details:
- Use paint to add patterns, overlays, or even glitter for extra sparkle.
- Opt for a glossy or matte glaze for a professional finish, sealing the paint and making your beads durable.
Assembling the Bracelet
Cut the Cord:
Cut a length of elastic cord (about double the size of your wrist) to allow for stretching and tying.
String the Beads:
- Start threading your beads onto the cord, creating your desired pattern. Alternate between different designs for a unique look.
- For instance, if your design incorporates pumpkins and ghosts, add them in a repeating sequence.
Securing the Bracelet:
- Tie a knot in the elastic, making sure it’s secure but not too tight, so the bracelet is comfortable to wear.
- If using beading wire and clasps, thread the wire through a clasp, twist securely, and then thread on your beads before adding the other side of the clasp.
Final Touch and Style
Once your bracelet is complete, try it on! If you have leftover beads or materials, consider making earrings or an accompanying necklace for a full Halloween set. Pair your new creation with a festive outfit for trick-or-treating or Halloween parties!
Fun Variations
- Thematic Colors: In addition to traditional Halloween colors, experiment with siren-themed blues and greens or add metallic elements for a witchy shimmer.
- Charm Beads: Get extra creative by molding shapes that represent Halloween folklore like cauldrons, magical wands, or skulls.
- Glow-in-the-Dark: Use glow-in-the-dark clay or paint for an enchanting surprise when the sun goes down.

The Charm of Clay Beads
Clay beads are a versatile and creative medium that allows for endless customization. They can be shaped, painted, and detailed to fit any theme, making them perfect for Halloween. You can create beads in shapes of pumpkins, ghosts, witches’ hats, bats, and more. With just a few materials and a little imagination, your wrist can become a canvas for holiday expression.
Materials You’ll Need
Before you can create your eerie elegance, gather the following materials:
- Polymer Clay: Choose Halloween colors like orange, black, purple, and green.
- Clay Tools: A rolling pin, crafting knife, and various shaping tools.
- A Baking Sheet: For curing your polymer clay beads in the oven.
- Jewelry Wire or Elastic Cord: Depending on whether you want a stretch bracelet or one with a clasp.
- Beading Supplies: Include beads, spacers, and any Halloween-themed charms you’d like to incorporate.
- Pliers: For working with wire or clasps.
- Paint and Brushes: Optional, if you want to add details or patterns to your beads after baking.
Step-by-Step Instructions – Halloween clay bead bracelet ideas
Planning Your Design:
Begin by sketching your bracelet design. Decide on the color scheme and the types of beads you want. For instance, a combination of pumpkin-shaped beads with black bats and eye beads can set the eerie tone beautifully.
Preparing the Clay:
- Condition the Clay: Start by kneading your polymer clay until it’s soft and pliable. This ensures even consistency as you shape it.
- Choose Colors: Roll out clay into different colors according to your design. An orange ball for a pumpkin, a black flat piece for a bat, and so on.
Shaping the Beads:
- Pumpkin Beads: Roll a small orange ball and use a toothpick or a small tool to create lines for the pumpkin’s ridges. Shape a tiny green stalk to complete the look.
- Ghost Beads: Roll white clay into a teardrop shape and flatten the bottom. Use black clay for tiny eyes and a mouth.
- Witch Hat Beads: Form a cone shape from black clay and add a slender band of another color for the buckle.
Baking the Beads:
Once your beads are shaped, place them on a baking sheet and bake them according to the polymer clay instructions, typically at 275°F (130°C) for 15-30 minutes. Keep an eye on them to avoid scorching.
Painting and Finishing Touches:
Upon cooling, you might want to paint or seal your beads with a clear glaze for added shine. Use paintbrushes to create intricate designs or details like cobwebs and spooky eyes.
Assembling the Bracelets:
- Cut the Wire or Cord: Measure your wrist and cut the appropriate length, leaving extra for knots if using elastic cord.
- Bead Stringing: Thread the beads onto your wire or cord in the desired order. Mix in other beads or charms for added flair.
- Finishing the Bracelet: If using wire, secure the ends with pliers to create a loop for a clasp. If using elastic, tie a secure knot and trim any excess.
Design Inspirations
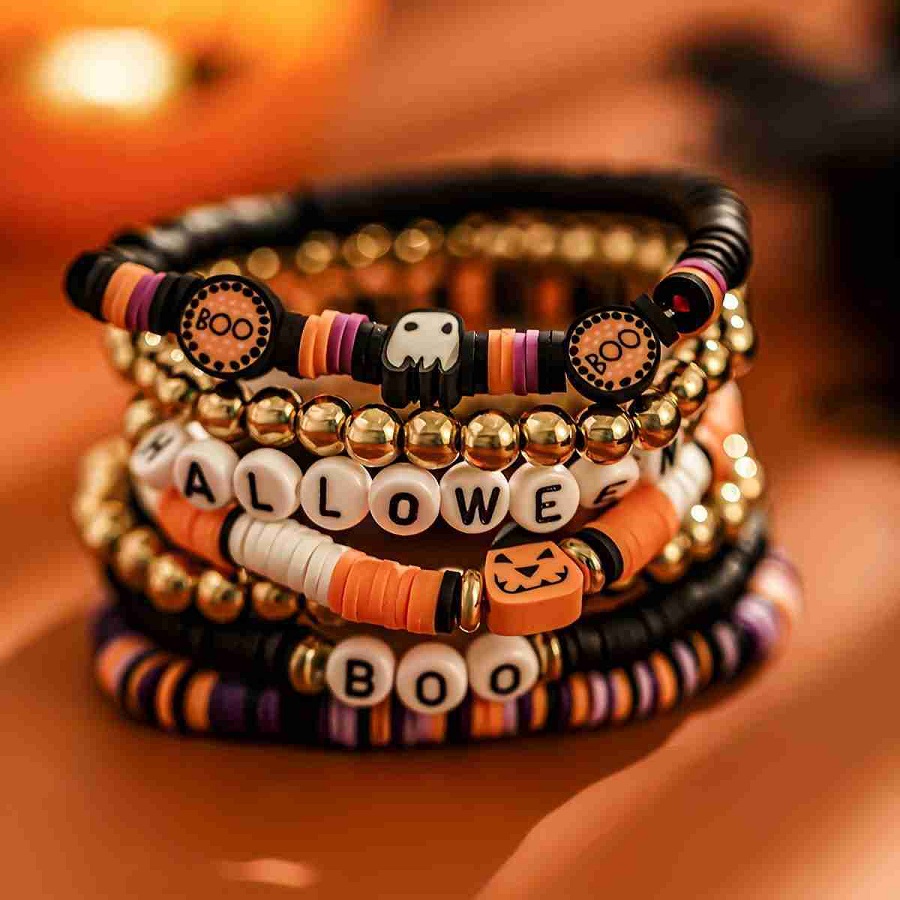
- Classic Pumpkin and Ghost: Alternate between bright orange pumpkin beads and white ghost beads for a fun and traditional Halloween look.
- Spooky Night: Use black beads with luminous white charms like crescent moons and stars, paired with silver spacers for a twinkling effect.
- Witchy Vibes: Incorporate deep purple and emerald green beads alongside witch hat charms and a few skull accents for that mystical look.
- Candy Corn Delight: Use yellow, orange, and white beads to mimic the appearance of candy corn, creating a sweet and festive bracelet.
- Creepy Crawlies: Incorporate a mix of spider and bug charms with dark beads. Add some metallic elements or glow-in-the-dark beads for an extra spooky effect.

Conclusion – Halloween clay bead bracelet ideas
Crafting Halloween clay bead bracelets is not just a fun way to celebrate the season, but it also allows you to showcase your personal style. As you gather your materials and let your imagination run wild, you’ll find that each bead tells a story, making your accessories uniquely yours. So, gather your friends or family for an evening of crafting, indulge in your creativity, and wear your eerie elegance this Halloween as you wander through the festivities!
