Introduction:
Preppy aesthetic clay bead bracelet ideas – In the realm of fashion and accessories, personal style often serves as a canvas for self-expression. For those who adore the classic yet contemporary appeal of preppy fashion, crafting your own jewelry can elevate your aesthetic to new heights. Enter the world of DIY clay bead bracelets—where creativity meets sophistication, offering a touch of individuality to any ensemble. With a few simple steps and some artistic flair, you can create unique, charming bracelets that perfectly encapsulate the essence of preppy charm.
Materials You’ll Need:
- Polymer clay in various colors (think pastels, navies, whites, and earthy tones for that preppy feel)
- Rolling pin or clay conditioning machine
- Cutting tools or clay cutter sets (for uniform beads)
- Toothpick or skewer (for piercing beads before baking)
- Sandpaper or emery board (for smoothing edges post-baking)
- Clear glaze or varnish (to seal and add shine)
- Elastic cord or beading wire
- Jewelry clasps and crimp beads (optional)
- Measuring tape or ruler
- Oven (for baking the clay according to package instructions)
- Work surface protected with wax paper or a silicone mat
Design Inspirations:
- Nautical Stripes: Embrace the coastal preppy vibe by creating alternating bands of navy and white clay beads. Roll out each color separately, cut into thin strips, then twist together gently before rolling into a bead shape. This design adds a touch of maritime elegance to your bracelet.
- Pastel Palette: Choose soft pastel hues like mint green, baby blue, and pale pink. Mix and match these colors to create a sweet and delicate bracelet that exudes understated elegance. Consider adding gold accents for a touch of glamour.
- Monogrammed Marvels: Personalize your bracelet by creating small, intricately designed letter beads. Use a fine-point tool to etch initials or monograms onto the surface of the beads before baking. This adds a bespoke element to your accessory.
- Pineapple Punch: Pay homage to the iconic symbol of hospitality by molding tiny pineapple-shaped beads. Paint them in bright yellow or gold after baking, and pair with complementary solid-color beads for a playful yet sophisticated look.
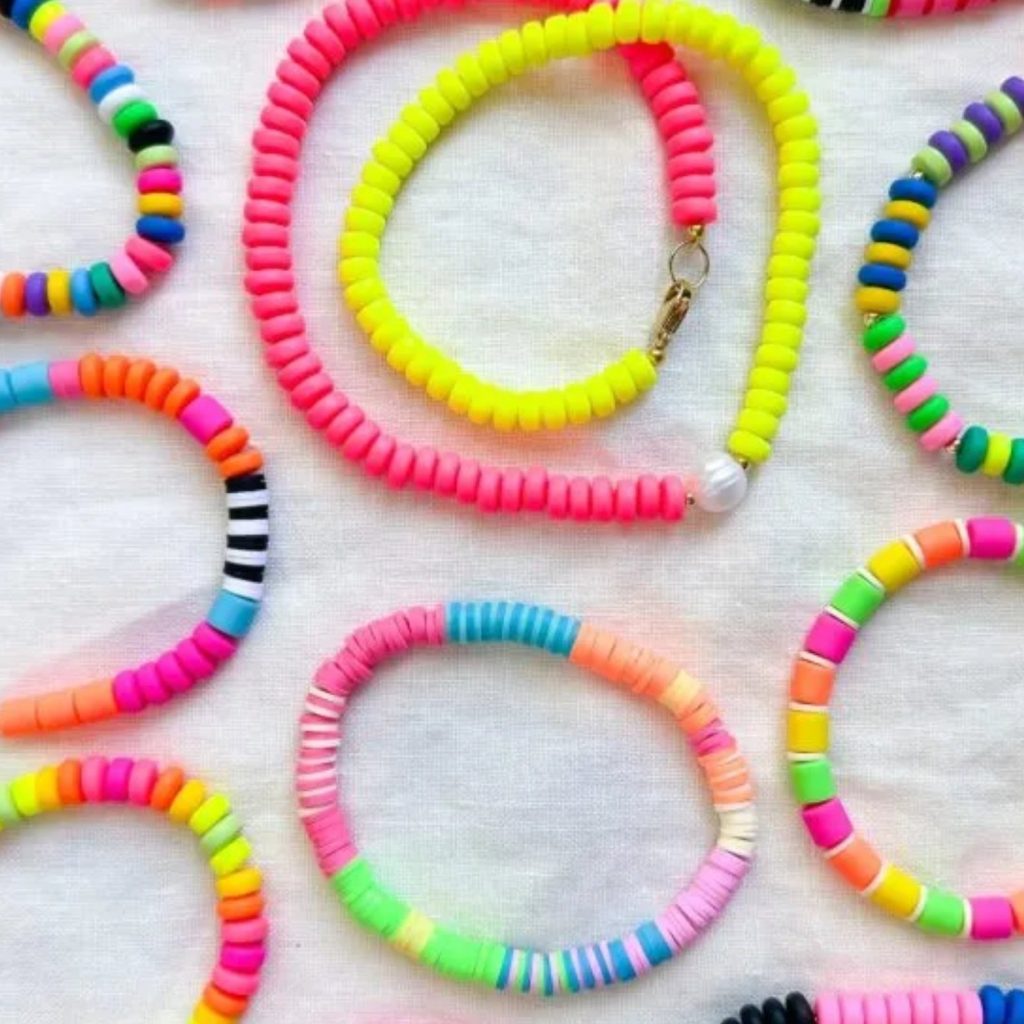
- Geometric Gems: Cut clay into various geometric shapes such as triangles, hexagons, and diamonds. Arrange these in a pattern that appeals to your taste, perhaps alternating between shapes and colors for added depth and interest.
Creating Your Preppy Clay Bead Bracelets:
- Conditioning and Shaping: Start by kneading the polymer clay to soften it. Roll it into a snake or use a conditioning machine to achieve an even thickness. Cut uniform beads using your cutter set or freehand with a knife.
- Piercing and Detailing: Before baking, use a toothpick to create a hole through each bead, ensuring it’s large enough for your cord or wire to pass through later. Add any surface details like stripes, dots, or patterns now.
- Baking and Finishing: Follow the manufacturer’s instructions to bake your beads in the oven. Once cooled, lightly sand the edges to smooth any rough spots. Apply a clear glaze for shine and protection.
- Assembly: Thread your beads onto the elastic cord or wire in your chosen design pattern. If using wire, attach a clasp and secure it with crimp beads for adjustability.
- Finishing Touches: Consider adding charms or tassels to further personalize your bracelet. These little additions can take your design from simple to stunning.
Materials Needed
Before diving into the creative process, gather the following materials:
- Polymer Clay: Choose a selection of colors that complement your personal style or the theme you wish to achieve. Polymer clay is ideal for its versatility and ease of manipulation.
- Rolling Pin: Use this tool to flatten the clay to an even thickness for cutting beads.
- Cookie Cutters or Shape Cutters: These will help create consistent bead shapes. Alternatively, you can use a craft knife for free-form shapes.
- Baking Sheet and Parchment Paper: Used for baking the clay beads as per the manufacturer’s instructions.
- String or Elastic Cord: Essential for stringing the beads into bracelets.
- Jewelry Findings: Includes clasps, jump rings, and crimp beads for finishing the bracelet ends.
- Optional: Paints, sealants, and decorative elements such as small beads, charms, or crystals to embellish the bracelets.
Step-by-Step Instructions
1. Prepare the Clay
- Conditioning: Knead the polymer clay to soften it and make it pliable. This process ensures the clay is smooth and free of air bubbles.
- Roll Out the Clay: Use a rolling pin to flatten the clay to a thickness of about 1/4 inch (6 mm). Adjust the thickness based on the size and style of beads you desire.
2. Create Beads
- Cutting Shapes: Use cookie cutters or shape cutters to cut out uniform shapes from the clay. Circles, squares, hearts, and geometric shapes are popular choices.
- Piercing Holes: Before baking, use a toothpick or needle to create holes in each bead where the string will pass through. Ensure the holes are large enough for your chosen string or elastic cord.
3. Bake the Beads
- Follow Manufacturer’s Instructions: Place the clay beads on a baking sheet lined with parchment paper. Bake them according to the instructions on the clay packaging. Typically, polymer clay bakes at around 275°F (130°C) for 15-20 minutes per 1/4 inch (6 mm) of thickness.
- Cooling: Allow the beads to cool completely before handling them.
4. Assembly and Design
- Stringing: Cut a piece of string or elastic cord to the desired bracelet length, adding a few extra inches for tying knots and adjusting the fit.
- Bead Arrangement: Thread the beads onto the string in your preferred pattern or design. Mix and match colors and shapes to create a unique look.
- Adding Accents: Incorporate additional beads, charms, or decorative elements between clay beads for added visual interest.
5. Finishing Touches
- Securing Ends: Once the bracelet is strung with beads, secure the ends using clasps, jump rings, or by tying knots. Ensure the bracelet fits comfortably on your wrist.
- Optional: Apply a sealant or varnish to the clay beads for added durability and a glossy finish. Allow the sealant to dry completely before wearing the bracelet.
Tips for Success – preppy aesthetic clay bead bracelet ideas
- Experiment with Colors: Blend different clay colors to create marbled or gradient effects for a sophisticated look.
- Personalize: Add initials, symbols, or textures to the clay beads using stamps or carving tools before baking.
- Customize Length: Measure your wrist or the recipient’s wrist to ensure a comfortable fit. Adjust the length of the bracelet accordingly.
- Have Fun: Crafting clay bead bracelets is not only a creative outlet but also a relaxing and enjoyable activity. Experiment with different designs and techniques to discover your unique style.
Monogram Magic – preppy aesthetic clay bead bracelet ideas
Personalization is key in preppy fashion, and what better way to achieve this than with monogrammed beads? Stamp initials onto flat clay discs before baking, then incorporate these into your bracelet design. Choose a font that’s both classic and legible, perhaps even mimicking the embroidery on a favorite polo shirt.
Tartan & Plaid Patterns – preppy aesthetic clay bead bracelet ideas
Recreate the iconic plaids and tartans associated with preppy style by creating intricate patterns on your clay beads. Use thin clay strips in contrasting colors to weave patterns directly onto the surface of larger beads or construct smaller beads in solid colors to mimic the checkered effect.
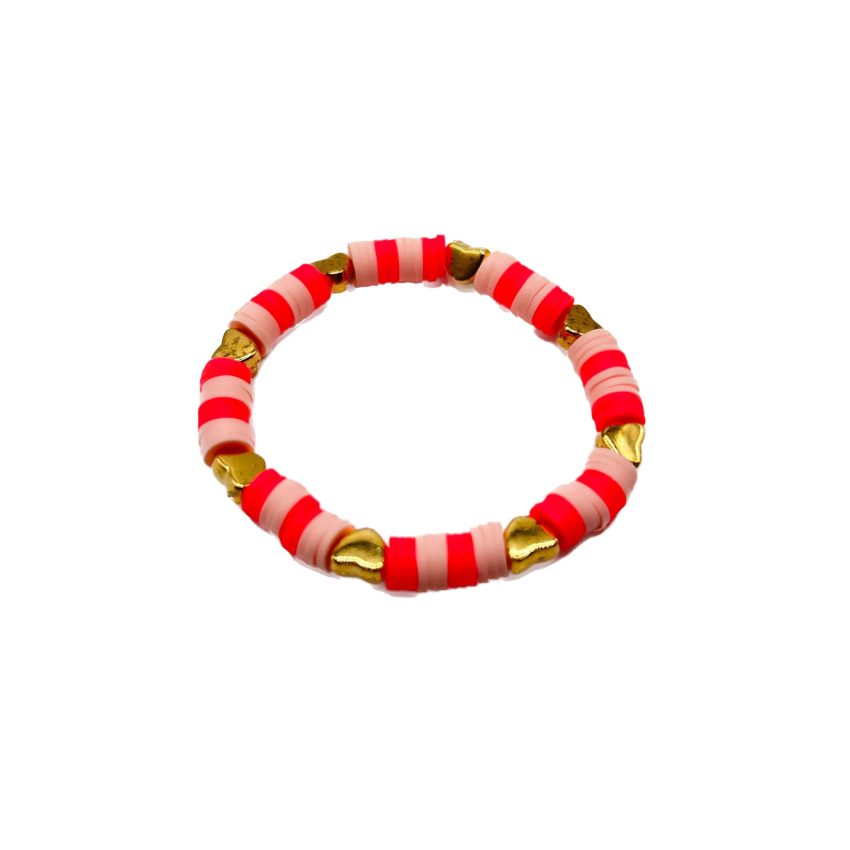
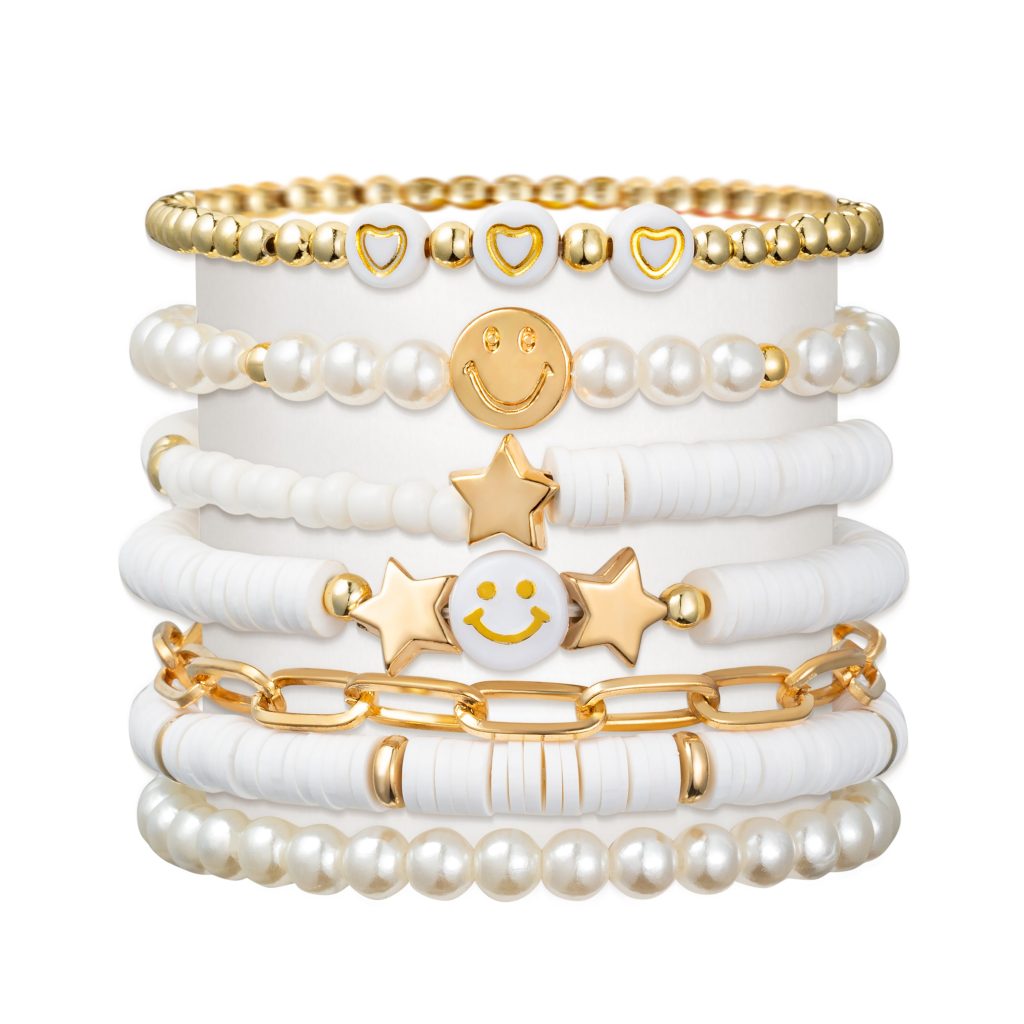
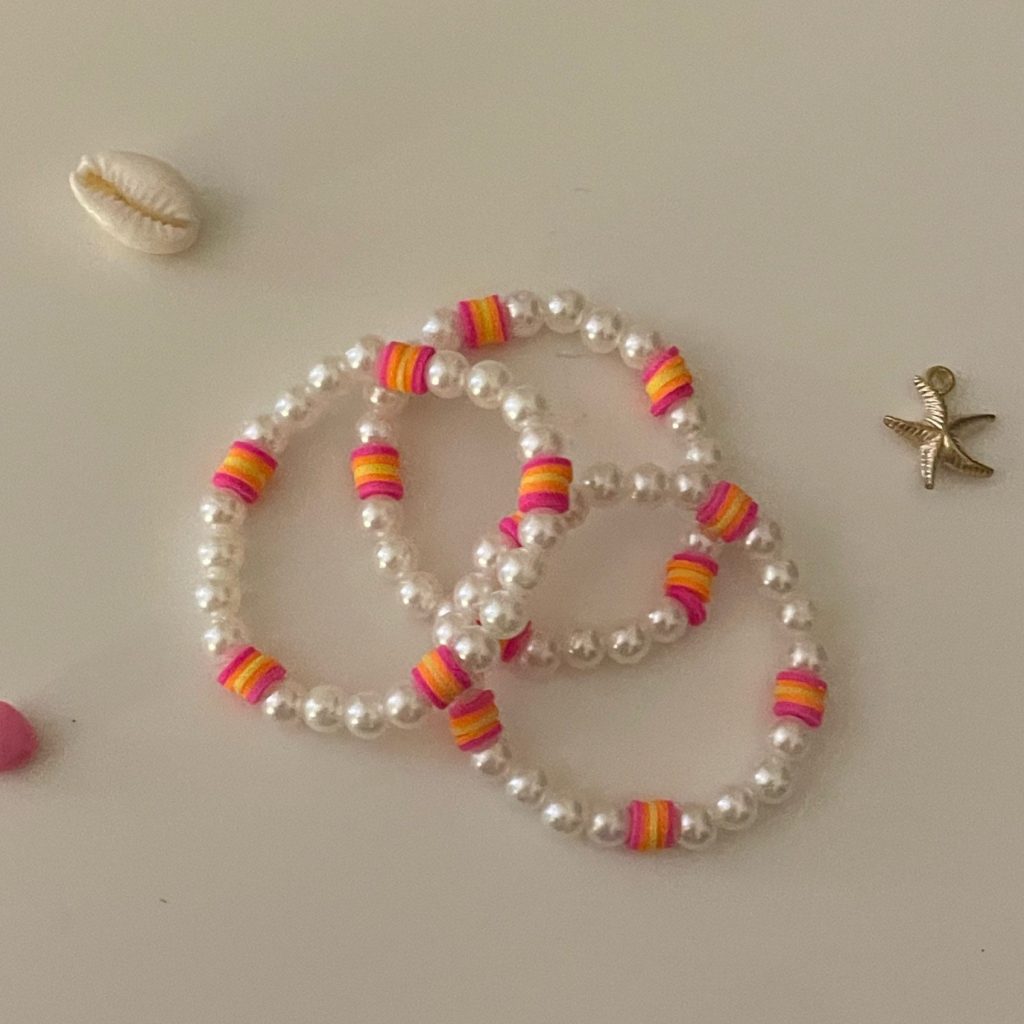
Pearls & Gold Accents
Incorporate the timeless elegance of pearls into your clay bead creations. Roll small balls of off-white or cream-colored clay and gently flatten one side to mimic the shape of a pearl. Intersperse these “pearls” with gold or metallic clay beads for a touch of opulence reminiscent of a string of pearls paired with a gold bangle.
Crafting Techniques & Tips
- Conditioning: Always condition your clay thoroughly before working to ensure it’s pliable and free of cracks.
- Consistency: Maintain a consistent size and shape for your beads to achieve a polished look.
- Baking & Finishing: Follow the manufacturer’s instructions for baking times and temperatures to prevent cracking or over-browning. After baking, consider sealing your beads with a clear varnish for added durability and shine.
- Stringing: Choose a strong yet subtle cord or chain that complements your beads. Elastic cords work well for easy-on, easy-off bracelets, while leather cords add a rustic touch.
Conclusion:
DIY clay bead bracelets offer a wonderful opportunity to infuse your preppy style with a dash of personal creativity. Not only do they make for delightful personal accessories, but they also serve as thoughtful, handmade gifts for friends and family. With endless design possibilities and the satisfaction of wearing something you’ve crafted yourself, these clay bead bracelets are sure to elevate your preppy aesthetic to new fashionable dimensions. So, roll up your sleeves, get creative, and let your wristwear become a conversation starter that reflects your unique sense of style.