Introduction
Diy bead bracelet – Creating your own jewelry not only adds a personal touch to your accessories collection but also serves as a fulfilling and creative outlet. Among the many DIY jewelry projects, bead bracelets stand out as a simple yet versatile craft that can be customized to suit any style or occasion. This beginner’s guide to DIY bead bracelets will walk you through the process step by step, equipping you with the knowledge and inspiration to start crafting your own unique pieces.

Gathering Supplies
Before diving into the creative process, gather your materials. Here’s a list of essentials to get you started:
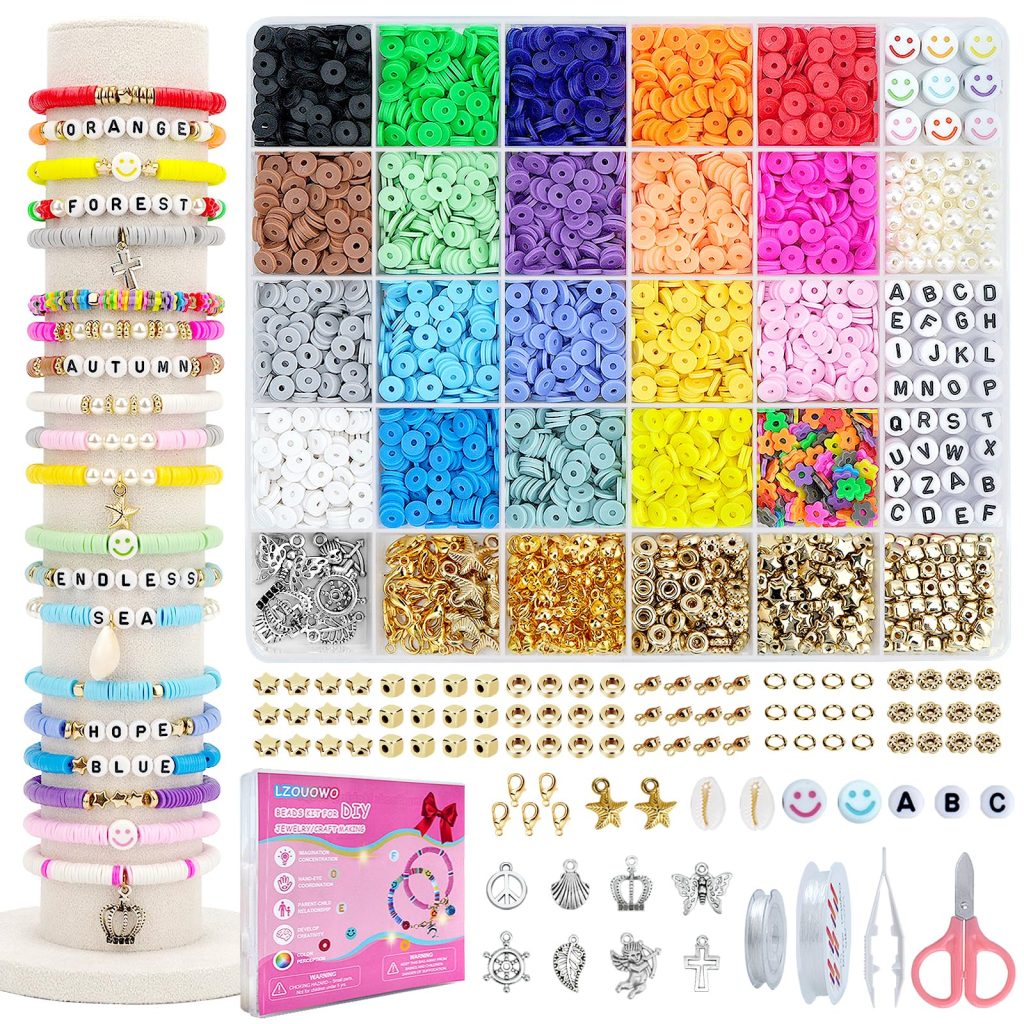
- Beads: The star of the show! Choose beads made from materials like glass, crystal, wood, stone, or polymer clay, depending on your desired aesthetic and budget. Consider mixing sizes and colors for added visual interest.
- Stringing Material: Elastic cord is the most beginner-friendly option for bead bracelets due to its stretchiness and ease of use. Other options include nylon thread, wire, or leather cords for different effects.
- Scissors: Sharp scissors to cut your stringing material.
- Clasps, Jump Rings, and Crimp Beads (optional): If you’re using non-elastic cord, you’ll need these to secure your bracelet. Clasps come in various styles like lobster or toggle, while crimp beads are used to secure the cord ends.
- Bead Stopper or Tape (optional): To prevent beads from sliding off the end of your string while working.
- Pliers (if using clasps): Needle-nose pliers or crimping pliers for attaching clasps and jump rings.
Choosing Your Design
The beauty of DIY bead bracelets lies in their endless customization possibilities. Some design ideas to consider:
- Simple Strand: A single strand of uniformly sized beads creates a classic look.
- Pattern Play: Mix and match beads to create repeating or random patterns.
- Charmed Bracelet: Incorporate small charms or pendants for added symbolism or personalization.
- Stackable Sets: Make several thin bracelets to be worn together for a trendy layered look.
Creating Your Bracelet: Step-by-Step
Measure Your Wrist
Wrap the stringing material around your wrist, leaving enough slack for comfortable wear and adding extra length for tying knots or attaching clasps. Cut the cord accordingly.
Stringing the Beads
If using elastic cord, tie a knot at one end and thread on your beads. For non-elastic cord, attach a bead stopper or tape the end to prevent beads from slipping off.
- Start with a pattern or design in mind, or simply let your creativity guide you.
- Ensure beads fit snugly but not too tightly against each other.
Finishing Touches
For Elastic Cord:
- Once you’ve strung all your beads, overlap the ends by about an inch and tie several tight knots, securing the beads in place.
- Apply a drop of clear nail polish or glue to the knot for added security. Let it dry completely.
- Trim any excess cord close to the knot.
For Non-Elastic Cord:
- Thread both ends back through a few beads to create a loop for the clasp.
- Attach one end of the clasp using a jump ring and crimp bead. Use pliers to close the jump ring and crimp the bead.
- Repeat on the other side with the other half of the clasp.
Tips for Success
- Quality Materials: Invest in good quality beads and stringing materials for a professional-looking finish.
- Color Harmony: Experiment with color combinations that complement your skin tone or outfit.
- Practice Patience: Take your time and enjoy the process. Precision and care will result in a better finished product.
- Personalize: Add special beads or trinkets that hold personal significance to make your bracelet truly unique.
With practice, you’ll soon master the art of creating DIY bead bracelets and be able to craft custom pieces for yourself and loved ones. Not only does this hobby offer a sense of accomplishment, but it also allows you to express your individuality through wearable art. Happy beading!

Getting Started: Materials and Tools
Materials:
- Beads: Choose beads that reflect your style and preferences. Beads come in various materials such as glass, wood, acrylic, gemstones, and metal. Select beads of different shapes, sizes, and colors to create visual interest.
- Stringing Material: Options include elastic cord, nylon thread, wire, or stretchy string. Elastic cord is popular for its ease of use and ability to stretch, making it ideal for bracelets.
- Findings: These include clasps, jump rings, and crimp beads. Clasps allow you to fasten the bracelet securely, while jump rings and crimp beads help attach findings to your stringing material.
- Tools: Depending on your chosen materials, basic tools like scissors, jewelry pliers, and a ruler may be necessary.
Step-by-Step Guide to Making Bead Bracelets
Measure and Cut the String:
- Measure the string to fit around your wrist comfortably. Add a few extra inches for tying knots or attaching clasps.
- Cut the string to your desired length using scissors.
Plan Your Design:
- Lay out your beads in the desired pattern or randomly if you prefer. Experiment with different combinations until you achieve a design you love.
Stringing the Beads:
- If you’re using elastic cord, secure one end with a bead stopper or a piece of tape to prevent beads from slipping off.
- String your beads onto the cord in the chosen pattern. Be mindful of spacing and arrangement to achieve the desired look.
Adding Findings:
- Once all beads are strung, add clasps if using them. Secure the ends of the string with crimp beads or knots to prevent beads from sliding off.
- Trim any excess string carefully with scissors.
Finishing Touches:
- Check the bracelet for any loose beads or gaps. Make adjustments as needed by tightening knots or adding additional beads.
- For stretchy bracelets, ensure the knots are secure and apply a drop of clear nail polish to the knot for added strength.
Tips for Customizing Your Bracelets
- Mix and Match: Combine different bead shapes, sizes, and textures to create unique designs.
- Personalization: Add charms, initials, or focal beads to personalize your bracelet.
- Experiment: Don’t be afraid to experiment with color combinations and bead arrangements.
- Layering: Create multiple bracelets to layer and stack for a trendy look.
Maintenance Tips
- Avoid Water Exposure: Remove bracelets before swimming or showering to prolong their lifespan.
- Storage: Store bracelets in a jewelry box or pouch to prevent tangling and protect them from dust.

Advanced Techniques to Elevate Your Bead Bracelets
Once you’ve mastered the basics of DIY bead bracelet making, there’s a whole world of advanced techniques and design elements to explore. These enhancements can take your creations to the next level, adding complexity and uniqueness to your jewelry pieces.
Knotting Techniques
- Macramé Knots: Learn basic macramé knots like the square knot or half-hitch to add intricate patterns and texture to your bracelets. This technique works particularly well with waxed cord or nylon threads.
- Ladder Stitch: This stitch creates a clean, woven effect, perfect for beadwork that requires structure or for incorporating beads in a linear pattern.
Wire Wrapping
Wire wrapping introduces metalwork into your designs, allowing you to create elaborate pendants, links, or clasps. You can wrap beads individually or use wire to form intricate designs around clusters of beads.
Bead Weaving
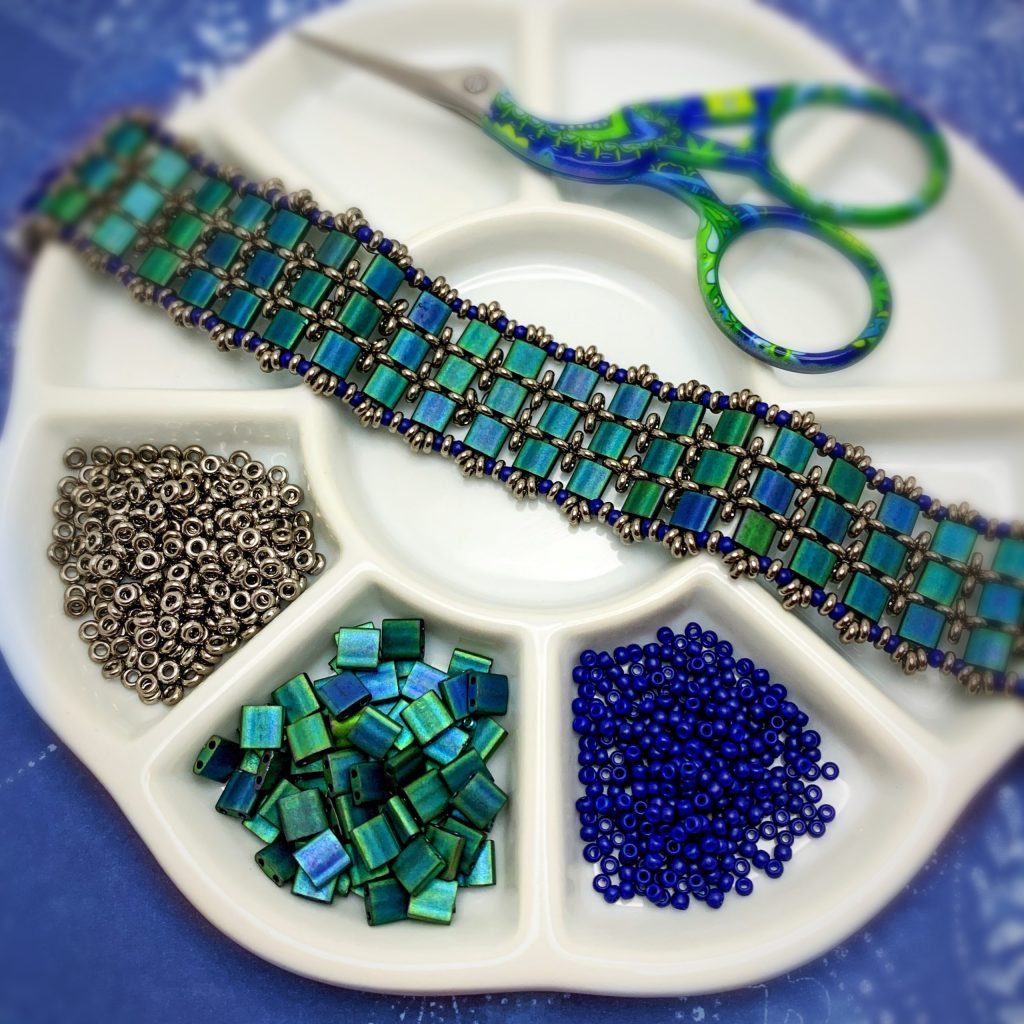
Bead weaving techniques, such as peyote stitch, brick stitch, or herringbone stitch, use seed beads to create intricate patterns and textures. This method results in dense, fabric-like structures that can be used to make stunning, intricate bracelets.
Incorporating Charms and Pendants
Take your bracelets to new heights by adding charms, pendants, or found objects. These can be attached directly to the cord or wire-wrapped for added security and style. Consider the story or symbolism behind each charm to personalize your bracelet further.
Mixed Media
Combine beads with other materials like leather, ribbon, or fabric to create mixed media bracelets. This fusion of textures and elements can lead to innovative and visually striking designs.
Advanced Closure Methods
Instead of standard clasps, experiment with unique closure methods like button loops, toggle clasps made from beads, or magnetic clasps for easy wearability and a touch of sophistication.
Beaded Bezels
Create bezels using seed beads to frame cabochons or flat-back crystals, adding a touch of glamour to your bracelet designs. This technique involves weaving beads around the edges of the centerpiece to hold it securely in place.
Personalizing for Gifts
DIY bead bracelets make thoughtful and personalized gifts. Consider the recipient’s preferences and style when choosing colors and designs. Adding initials, birthstones, or charms representing shared memories can make your creation even more meaningful.
Conclusion
Creating DIY bead bracelets is a delightful way to explore your creativity while producing stylish accessories. Whether you’re crafting for yourself or as gifts for loved ones, the process of selecting beads, designing patterns, and assembling bracelets can be both therapeutic and rewarding. With practice and experimentation, you’ll develop your own unique style and technique in bracelet making. So, gather your materials, unleash your creativity, and start crafting beautiful bead bracelets that reflect your personality and charm. Happy crafting!
